Getting Started
You are expected to have an AWS account to continue with this tutorial. If you don't have one, create one. It's ideal to create an AdminRole and work inside that instead of your ROOT account. This playlist from Tiny Technical Tutorials will help you set up IAM properly.
I assume you have a basic understanding of git and the web. Grab your popcorn and let's start.
Create a GitHub repo
If you already have a repo with your website files, use that. Otherwise:
- Run
npm create vite@latest aws-app -- --template vanilla-tsin your terminal. cd aws-app,npm install, thennpm run dev.- Your app should be available at
http://localhost:5173/. - Push this to GitHub.
Uploading files to S3
Simple Storage Service (Amazon S3) is an object storage service. We'll use it to host our static website.
-
In the project folder, run
npm run build. This generates adistfolder; those are the files we'll upload. -
Navigate to S3 in the console and create a bucket. Name it after your domain (I used
webapp.hstart.in). Default options are fine. -
Upload the
distfiles.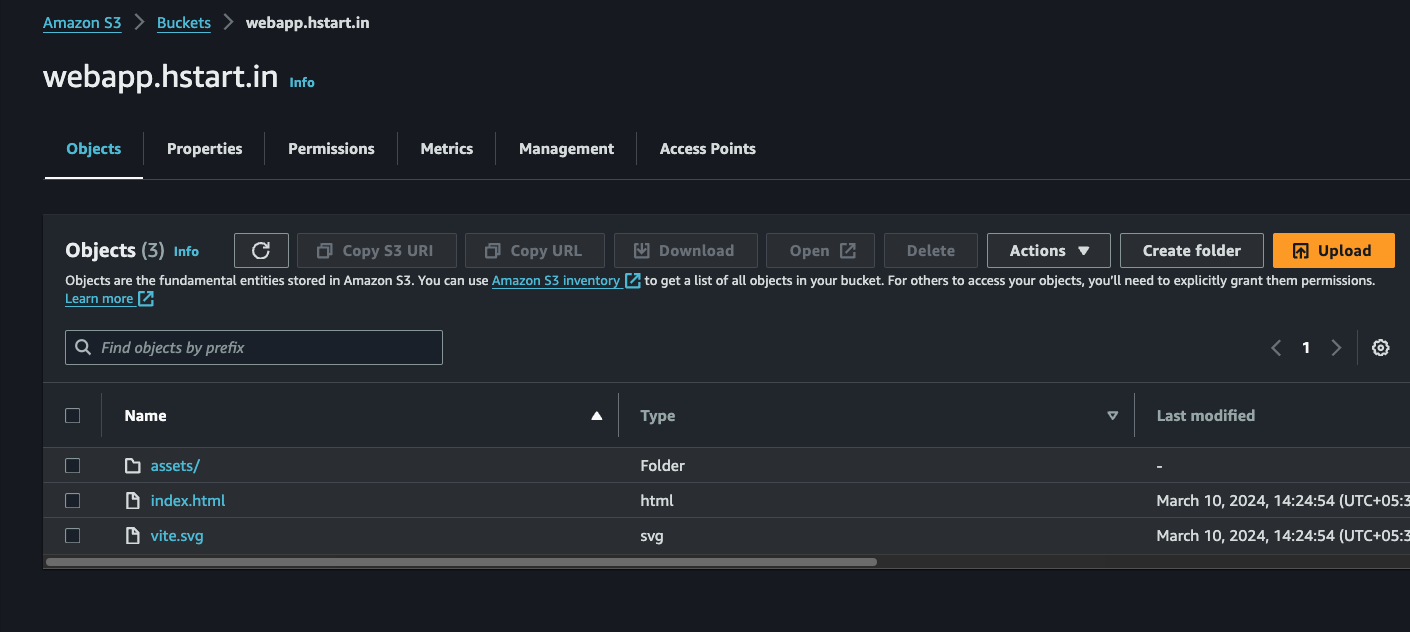
-
Go to the Properties tab, scroll to Static website hosting, click Edit, enable it, save.
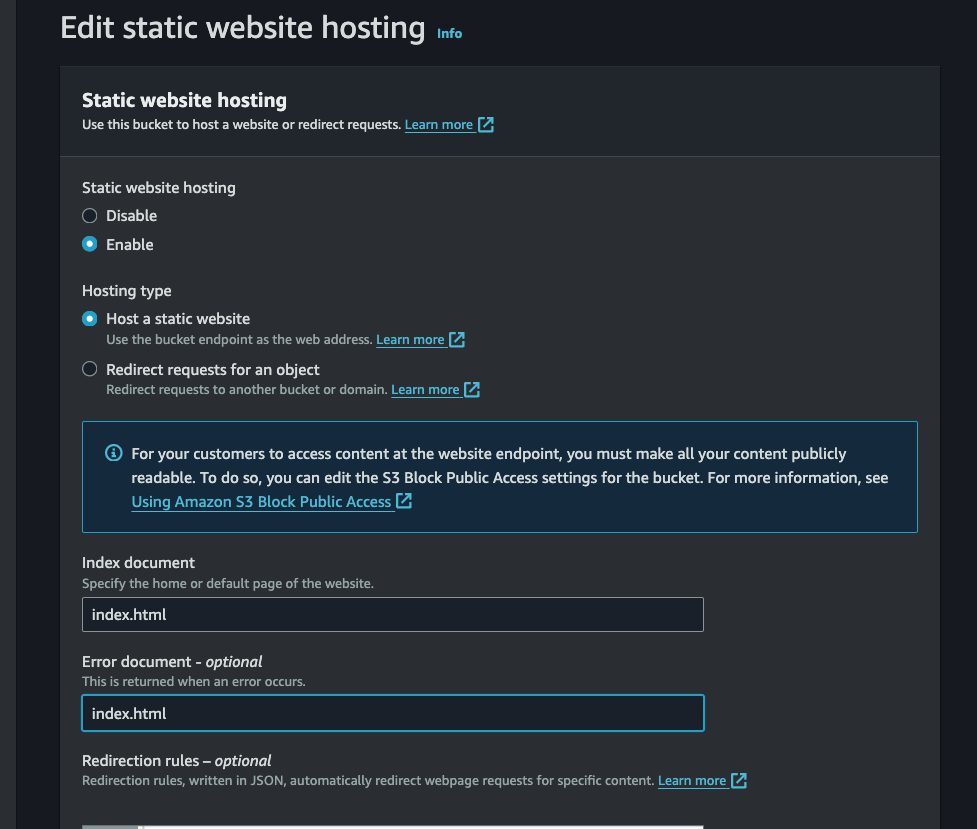
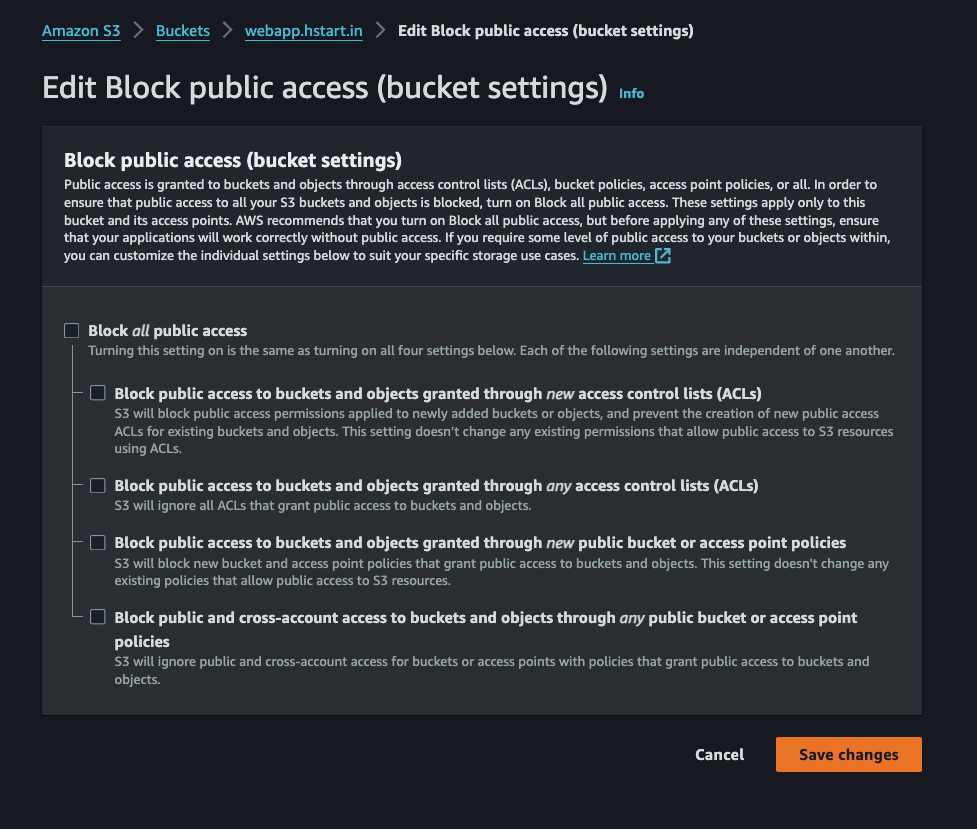
Although we've enabled static website hosting, the bucket still blocks all public access (default). We need to allow it.
-
Go to Permissions, click Edit on Block public access (bucket settings), uncheck the box, save, confirm.
-
Even though public access is allowed, without a bucket policy, hitting the object URL still returns Access Denied. Add this bucket policy (replace the bucket name with yours):
{ "Version": "2012-10-17", "Statement": [ { "Sid": "PublicReadGetObject", "Effect": "Allow", "Principal": "*", "Action": "s3:GetObject", "Resource": "arn:aws:s3:::webapp.hstart.in/*" } ] } -
Now you should be able to hit the object URL of each file directly. Files load, but the site isn't wired up as a website yet. That comes with CloudFront + SSL.
Setting up CloudFront
CloudFront is the CDN that distributes our website globally. It reduces latency by caching content closer to the users.
-
Create distribution.
-
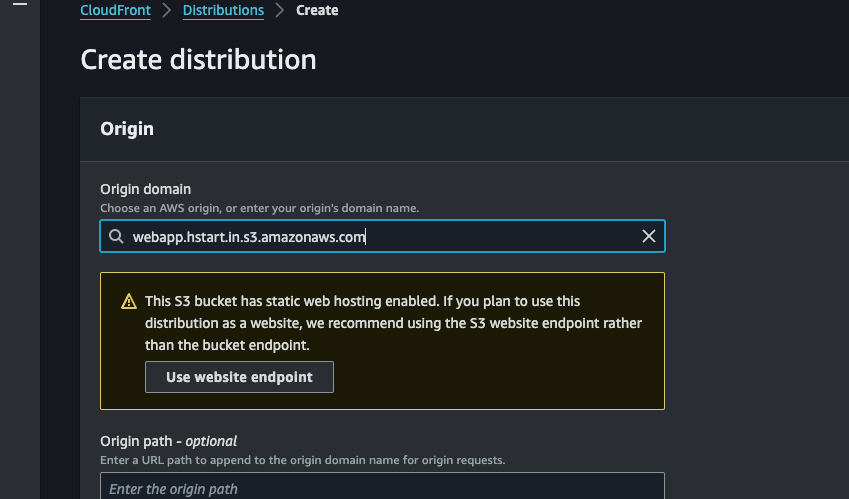
In the Origin domain input, select your S3 bucket. You'll get a warning; click Use website endpoint. Otherwise routing won't work correctly.
-
Choose Redirect HTTP to HTTPS.

-
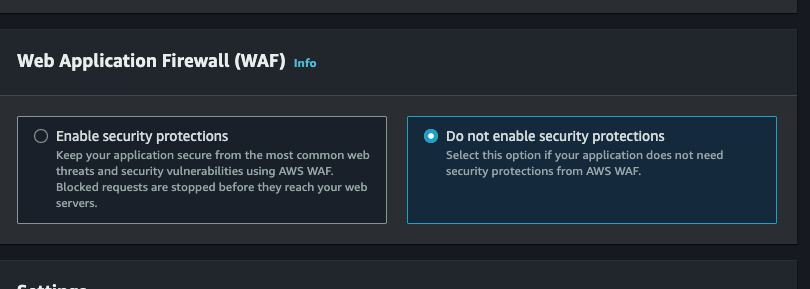
Disable Web Application Firewall for now.
-
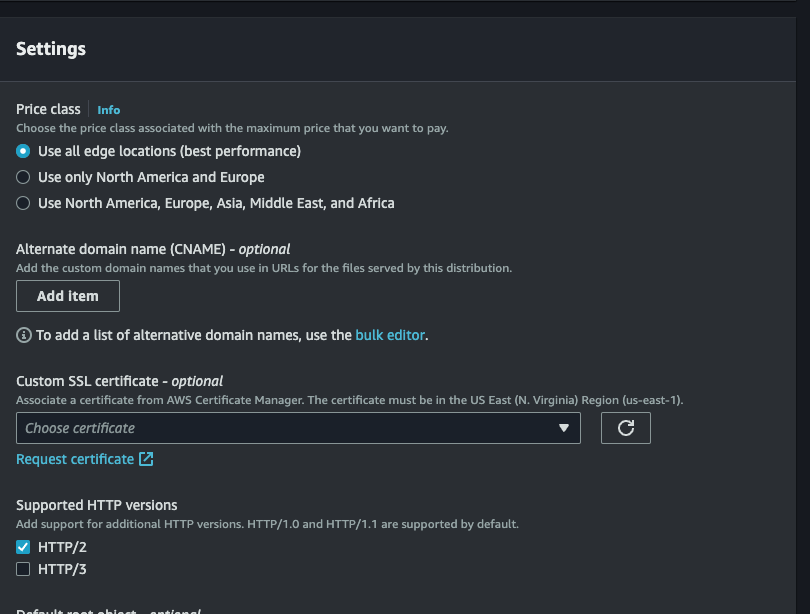
Since we're using a subdomain, we need an SSL certificate. Under Settings, click Request Certificate (below the Custom SSL Certificate input).
-
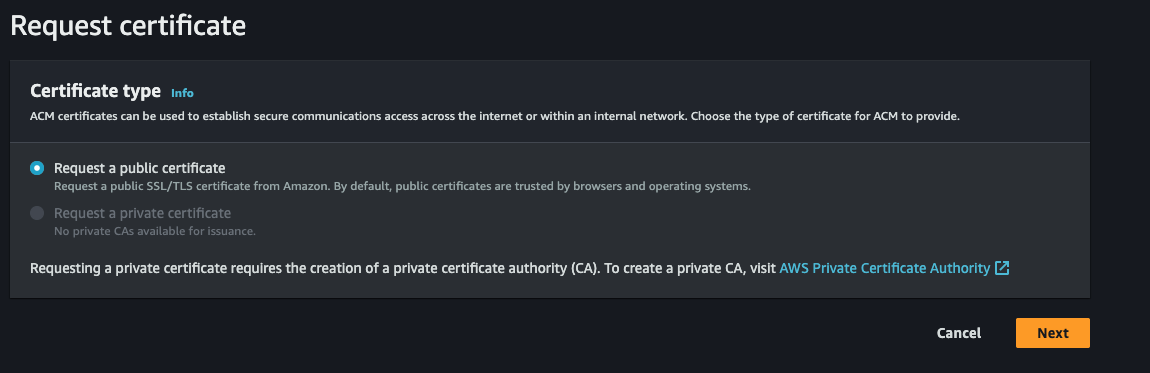
This opens AWS Certificate Manager in a new tab. Make sure the region is US East (N. Virginia) / us-east-1 — CloudFront requires certs in that region. Select Request a public certificate and click Next.
-
Add both the www and non-www versions of your subdomain. Leave everything else default, request certificate.

-
Click on the certificate being issued, then click Create records in Route 53 and confirm. If you don't have a hosted zone yet, create one first. Hosted zones cost around $0.60/month.

-
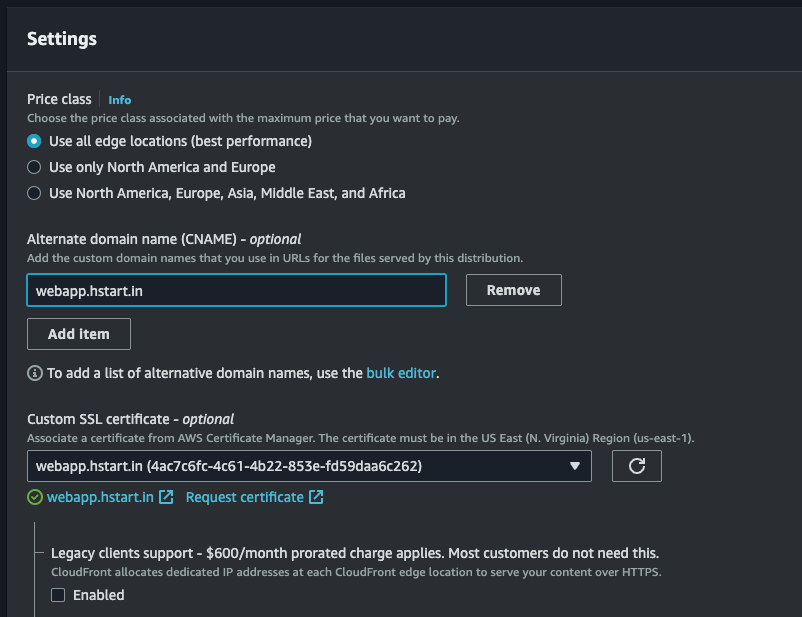
Come back to the CloudFront tab, click the refresh icon next to the SSL cert dropdown, and select the certificate you just created.

-
Optionally add an Alternate domain name. Keep everything else default and click Create distribution.
-
Your new distribution should appear.

-
Set up invalidations. When S3 content changes, we need to invalidate the CloudFront cache. Go to the distribution's Invalidations tab, click Create invalidation, add
/**/*to the input, create.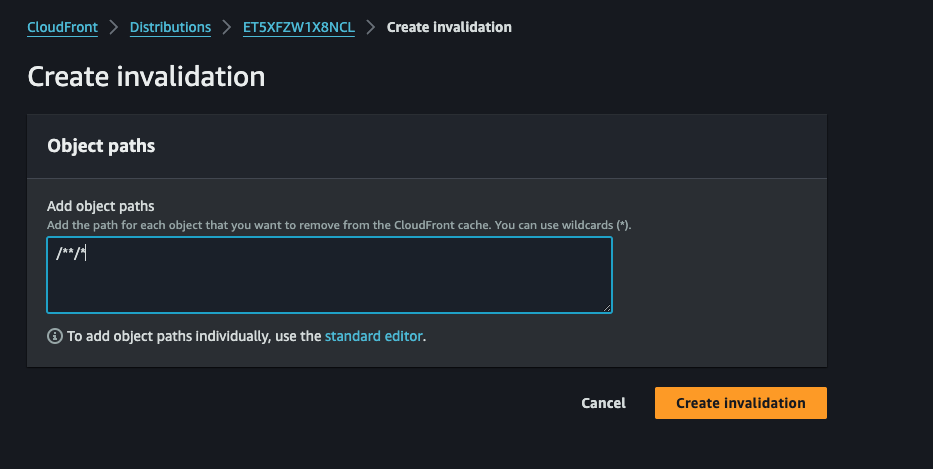
-
Copy the domain name from the distribution and open it in your browser. Your app is live on CloudFront.
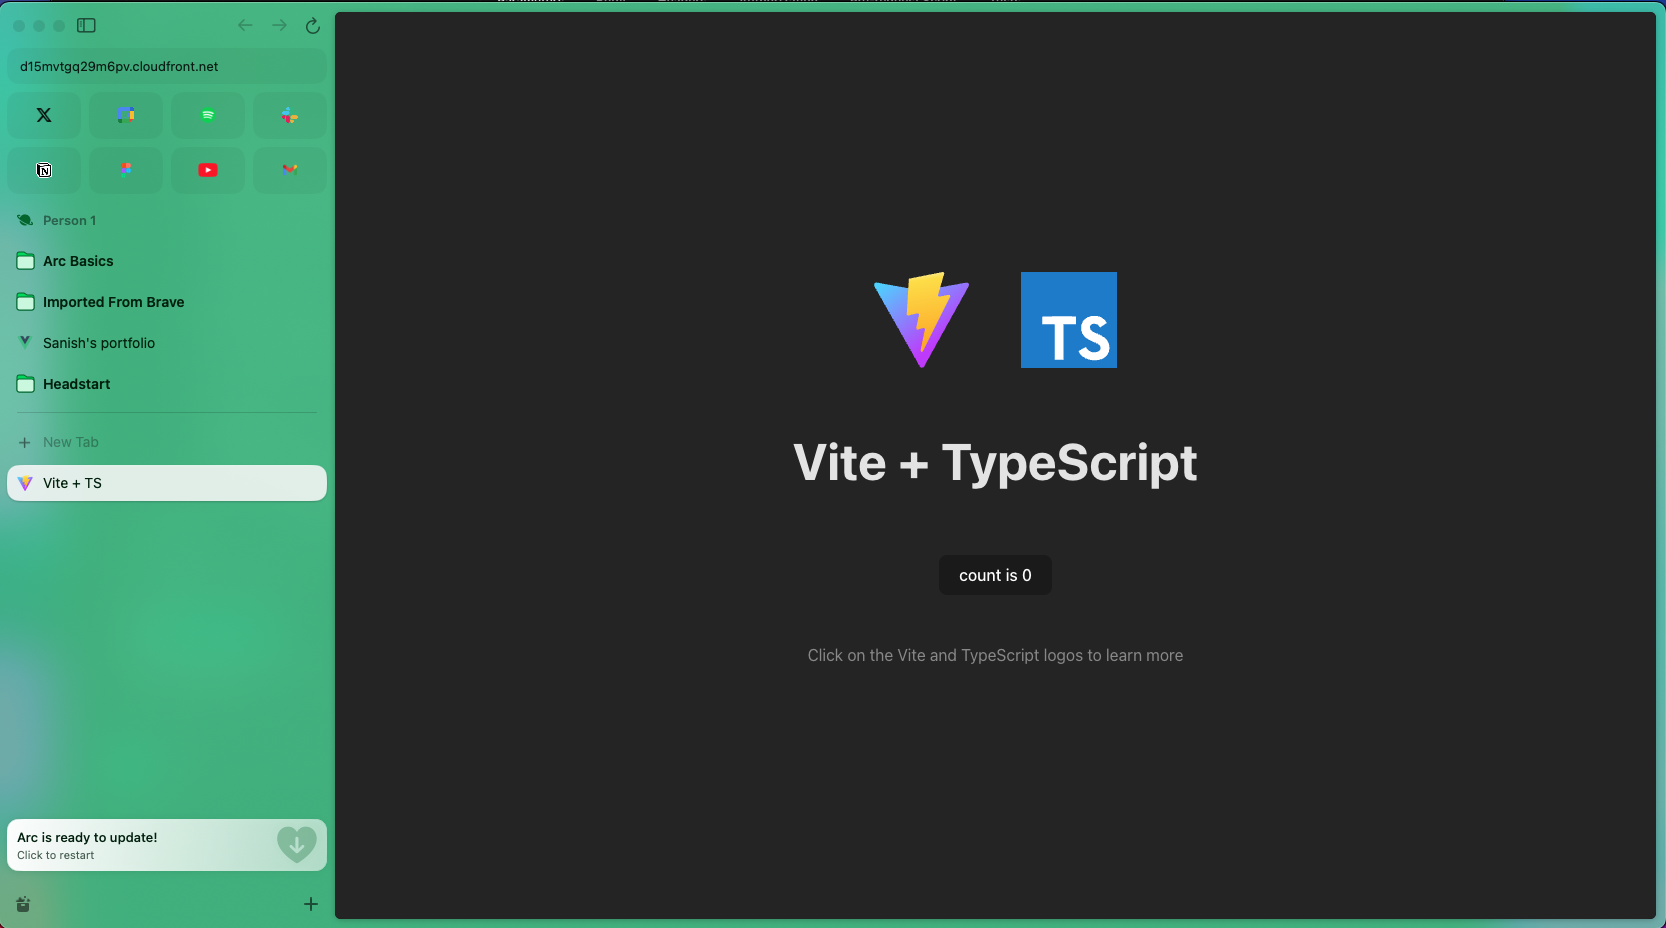
Setup subdomain
Although we've issued a certificate for the subdomain, Route 53 doesn't yet know where to route DNS queries for webapp.hstart.in.
-
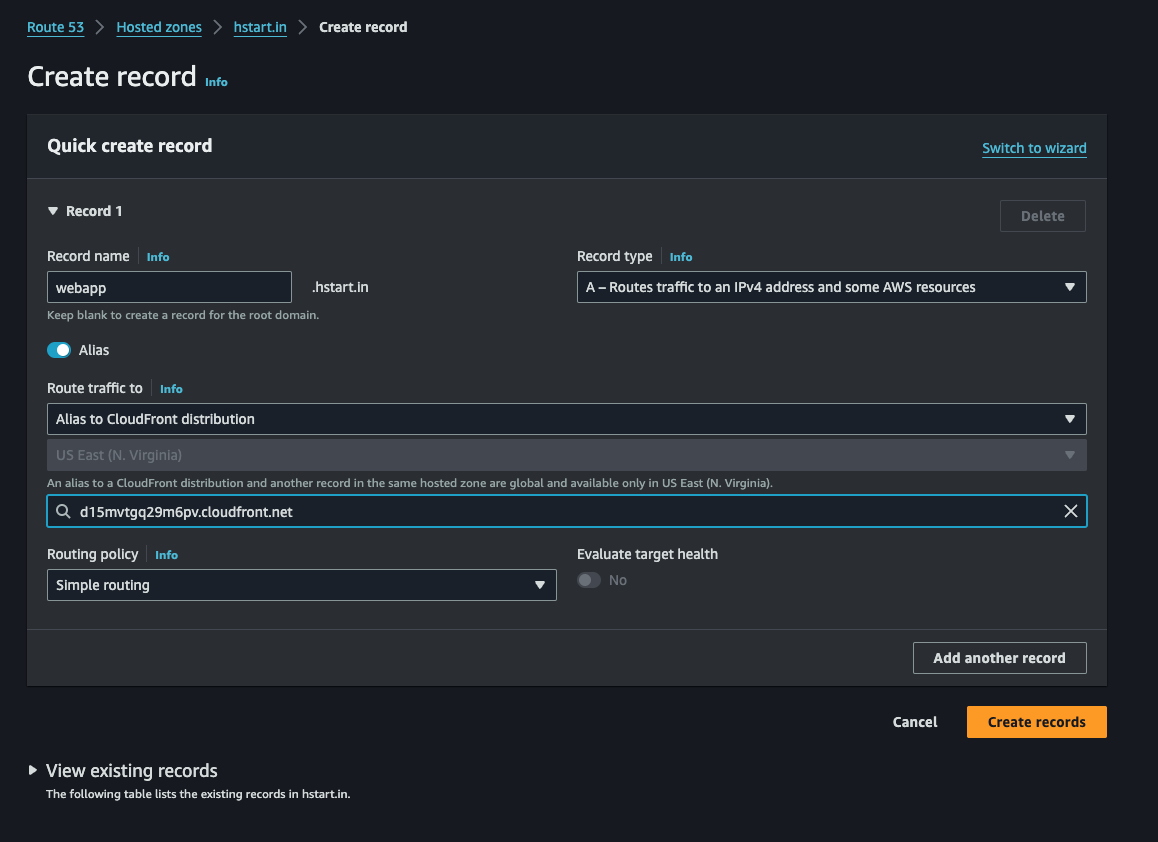
Go to Route 53, open your hosted zone, click Create record.
-
Enter your subdomain, select Record type A, toggle Alias on, select Alias to CloudFront distribution, then pick the distribution from the dropdown. Create records.
-
Give it a few minutes. Your site is now live at your subdomain.
Re-routing www to non-www
People often add www in front of URLs. Without setup, they'll hit a DNS error. Let's route www to non-www.
-
Create another bucket named
www.webapp.hstart.in. -
Go to its Permissions tab, uncheck Block public access, save.
-
No public policy or files needed; this bucket only redirects.
-
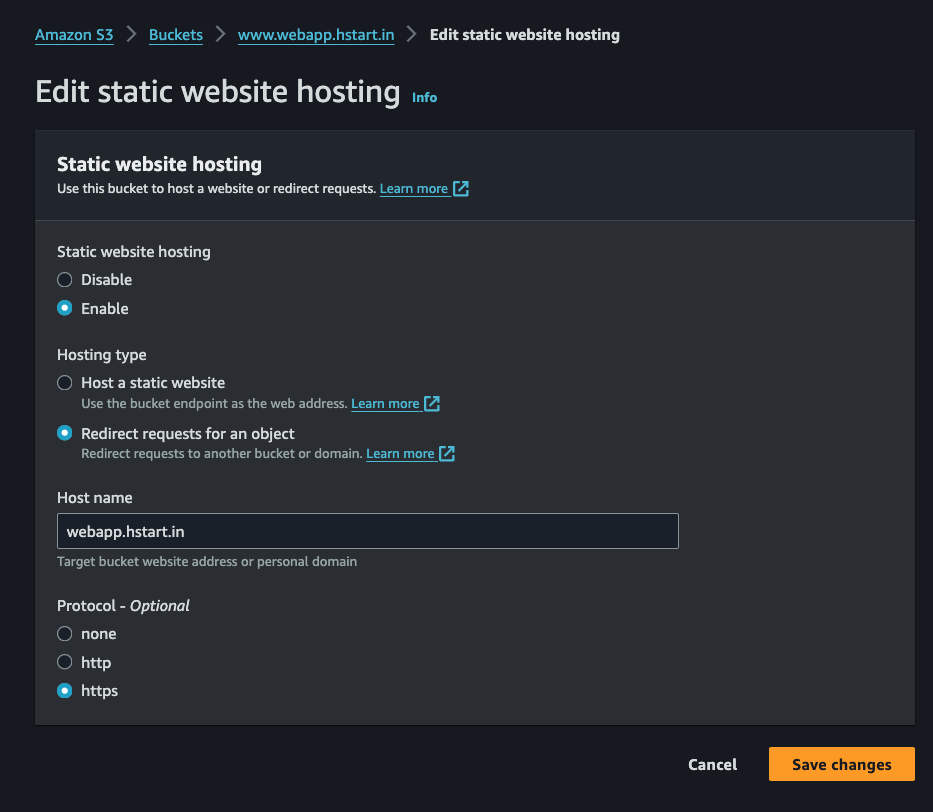
Go to Properties > Static website hosting, click Edit, enable, select Redirect requests for an object, set the target hostname (non-www version), choose https, save.
-
In CloudFront, create a new distribution pointing to this bucket. Reuse the same SSL certificate; it covers both.
-
In Route 53, point
www.webapp.hstart.into the new distribution, same way as before.
Now both https://webapp.hstart.in/ and https://www.webapp.hstart.in/ resolve correctly.
CI / CD
Manually building and uploading files is not sustainable. Let's introduce CodeBuild and CodePipeline.
Goal: on every push to main, CodeBuild builds the app, replaces the files in S3, and invalidates the CloudFront cache.
-
Go to CodeBuild, click Create project.
-
Pick a project name (I used
webapp). -
Select your source provider (GitHub). Authenticate if needed. Pick your repo.
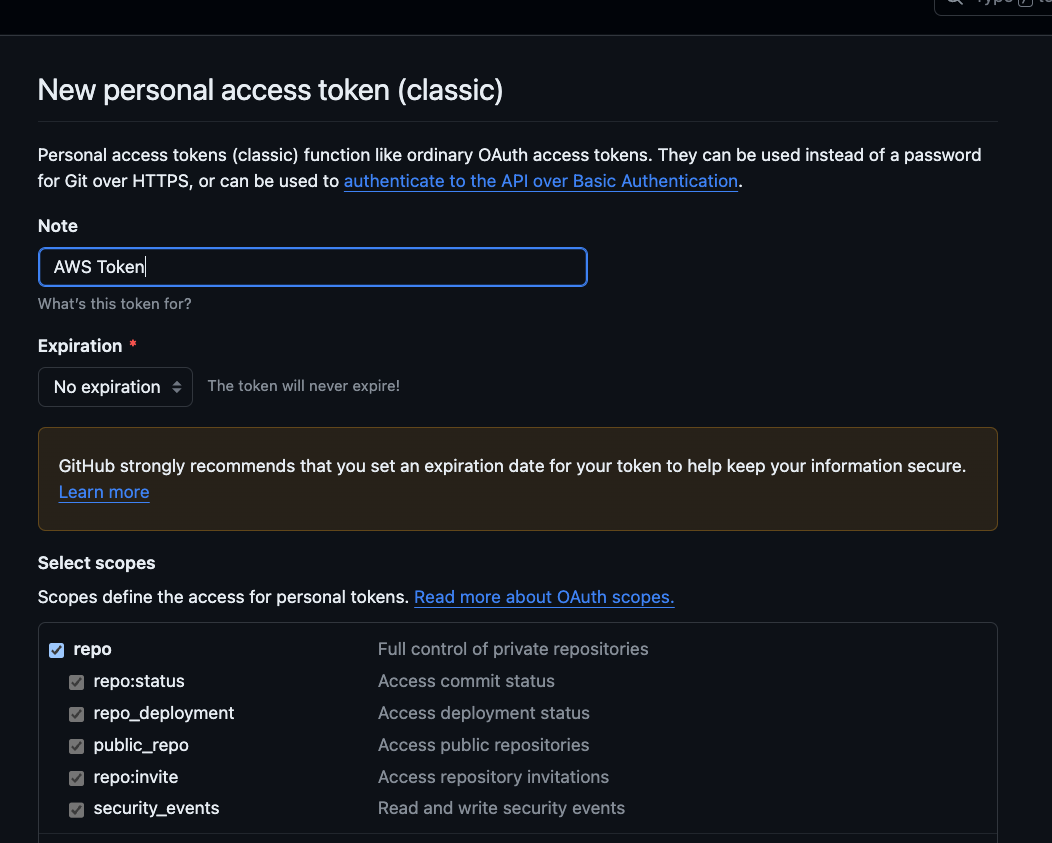
-
Add your main branch name to Source version.
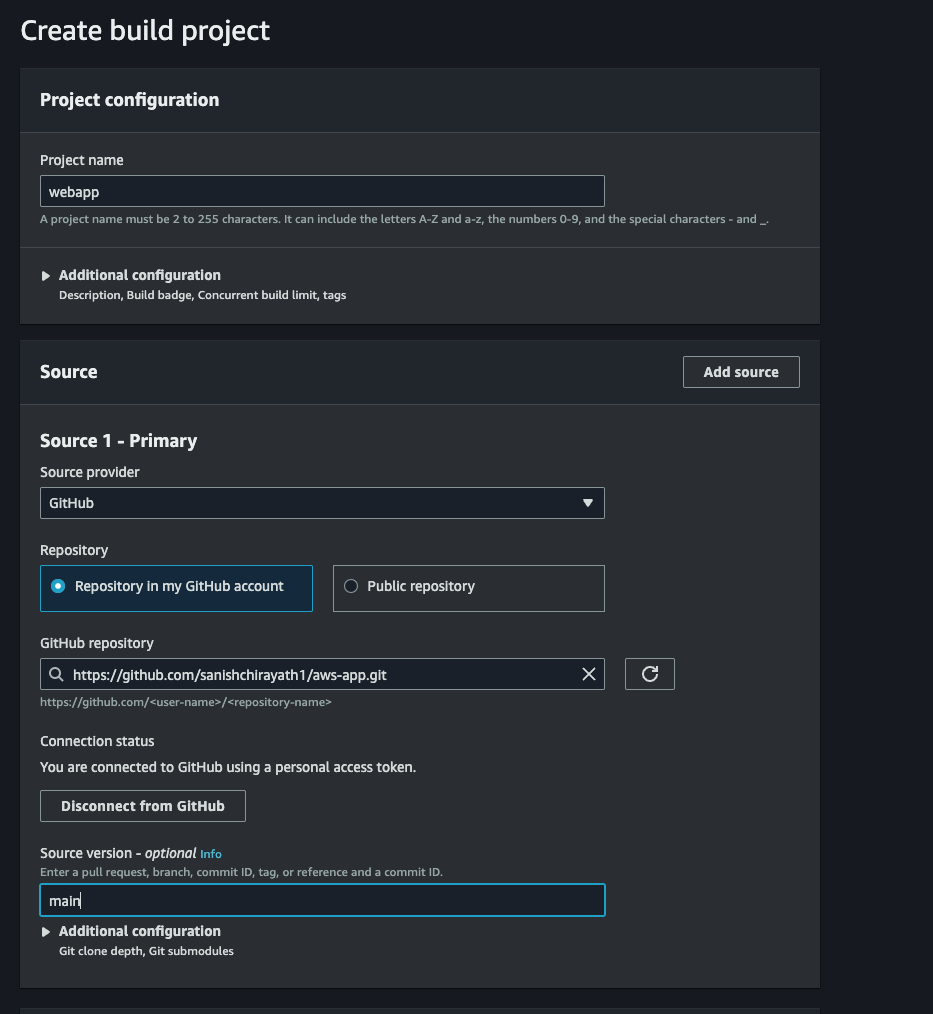
-
When CodeBuild creates this project, it also creates an IAM role. We'll attach the necessary policies to that role.
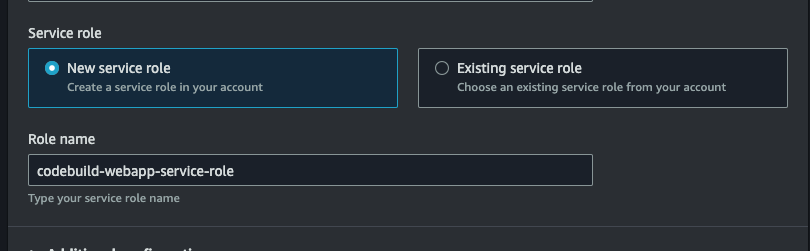
-
Select Use a buildspec file. We'll add
buildspec.ymlto the root of the project.
Here's the buildspec (replace the bucket name):
version: 0.2

phases:
  install:
    runtime-versions:
      nodejs: 18
  pre_build:
    commands:
      - npm install
  build:
    commands:
      - npm run build
      - aws s3 sync ./dist/ s3://webapp.hstart.in --delete
  post_build:
    commands:
      - echo "Build completed successfully"

artifacts:
  files:
    - '**/*'
Keep the rest at defaults and create the project.
-
Trigger a build from the console. It will fail because CodeBuild doesn't have S3 write permissions yet.

-
Go to IAM → Roles, find the role CodeBuild just created, click into the attached policy.
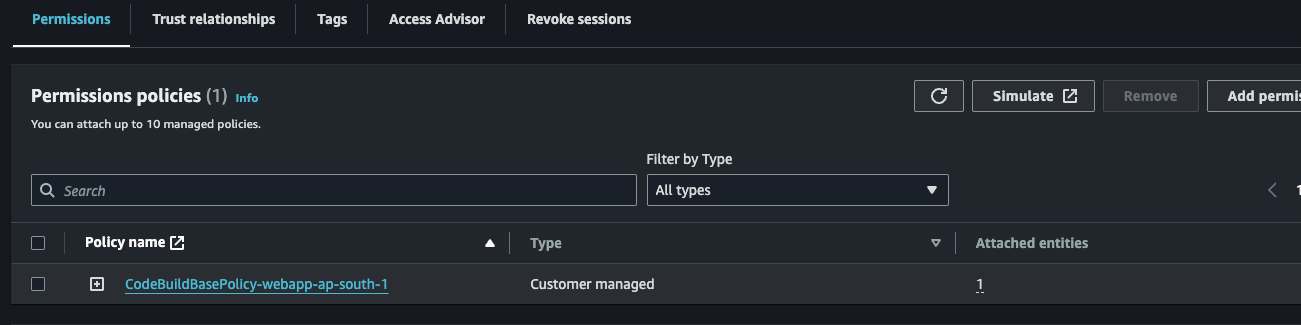
-
CodeBuild created a base policy already but it's missing S3 write permissions on our bucket. Add
PutObject,DeleteObject, andListBucket.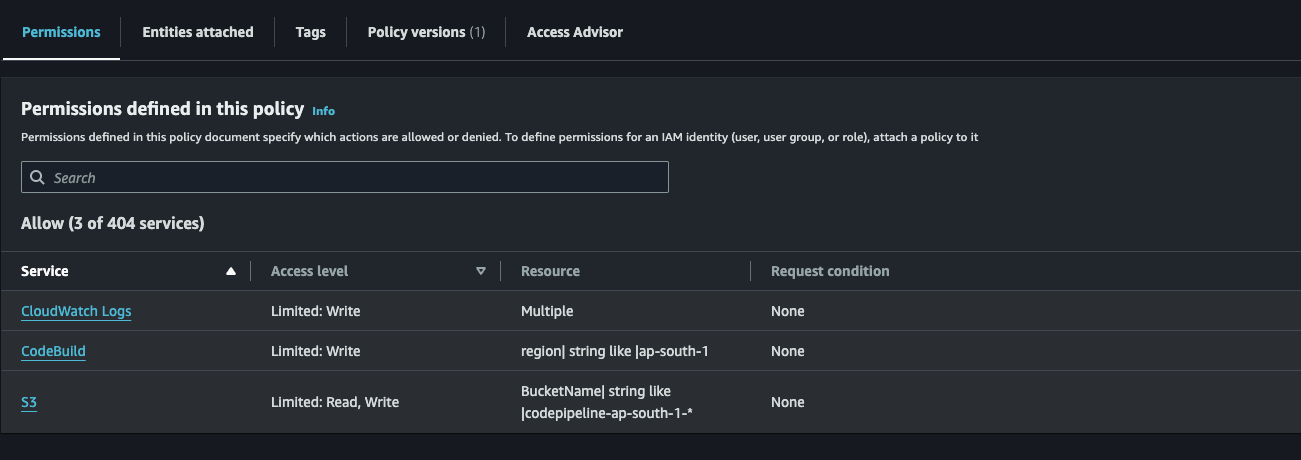
Add the bucket ARN and
/*to the resources array (use the JSON editor):arn:aws:s3:::webapp.hstart.in arn:aws:s3:::webapp.hstart.in/*Final policy will look similar to:
{
    "Version": "2012-10-17",
    "Statement": [
        {
            "Sid": "VisualEditor0",
            "Effect": "Allow",
            "Action": [
                "s3:ListBucket",
                "s3:GetBucketAcl",
                "logs:CreateLogGroup",
                "logs:PutLogEvents",
                "codebuild:CreateReportGroup",
                "codebuild:CreateReport",
                "s3:PutObject",
                "s3:GetObject",
                "logs:CreateLogStream",
                "codebuild:UpdateReport",
                "codebuild:BatchPutCodeCoverages",
                "s3:DeleteObject",
                "codebuild:BatchPutTestCases",
                "s3:GetBucketLocation",
                "s3:GetObjectVersion"
            ],
            "Resource": [
                "arn:aws:codebuild:ap-south-1:343391345253:report-group/webapp-*",
                "arn:aws:logs:ap-south-1:343391345253:log-group:/aws/codebuild/webapp",
                "arn:aws:logs:ap-south-1:343391345253:log-group:/aws/codebuild/webapp:*",
                "arn:aws:s3:::codepipeline-ap-south-1-*",
                "arn:aws:s3:::webapp.hstart.in",
                "arn:aws:s3:::webapp.hstart.in/*"
            ]
        }
    ]
}
Save. Retry the build.
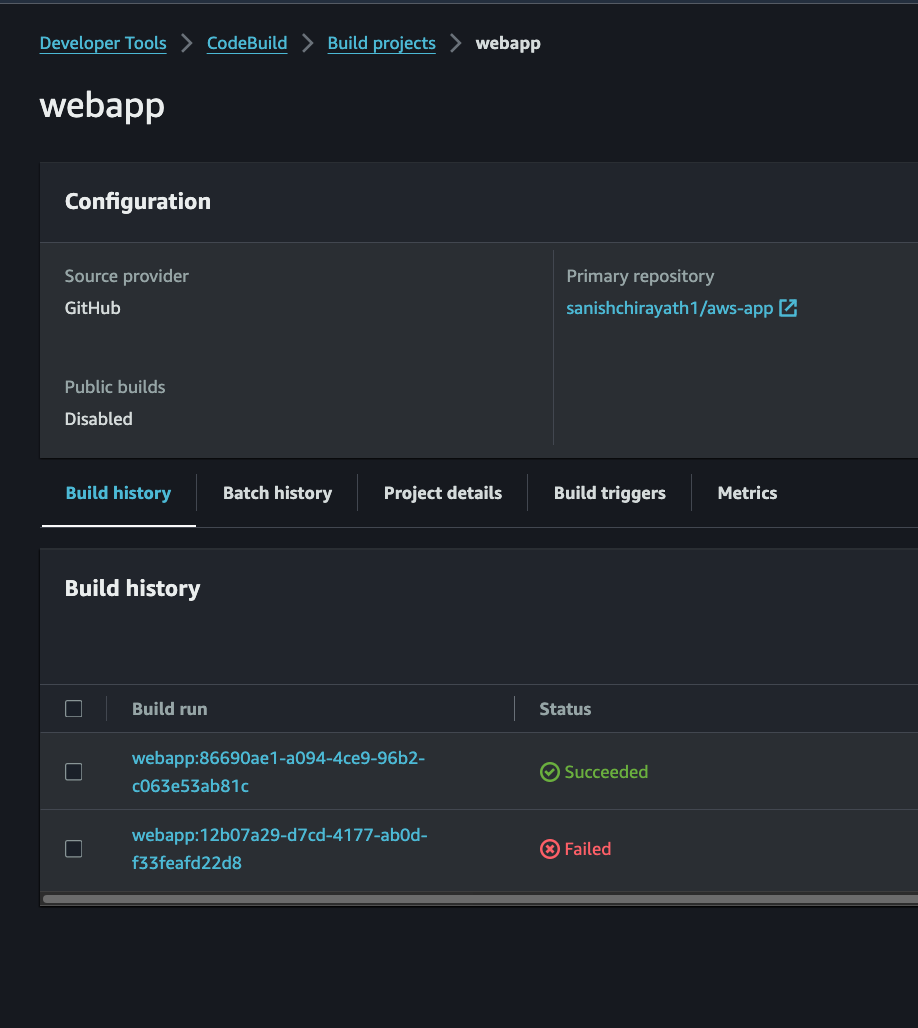
Now builds run on demand. But we still need to click the button. Let's automate with CodePipeline.
Setting up CodePipeline
-
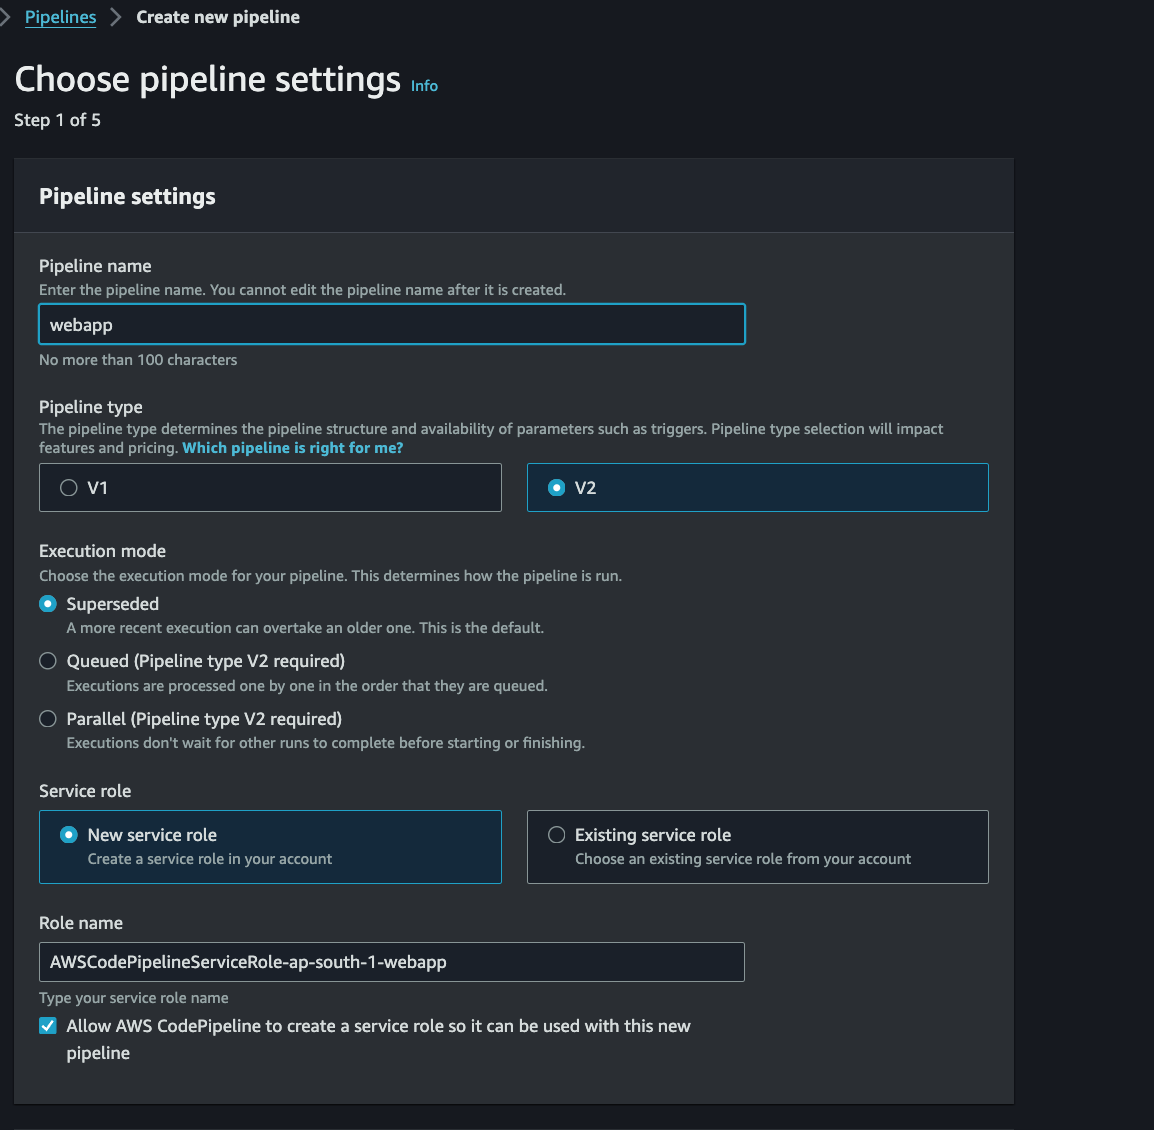
Go to Code Pipeline, Create pipeline. Choose V2. It auto-creates a role.
-
Connect to GitHub: name the connection, install the GitHub app, allow permissions.

-
Set the trigger to push on your main branch.

-
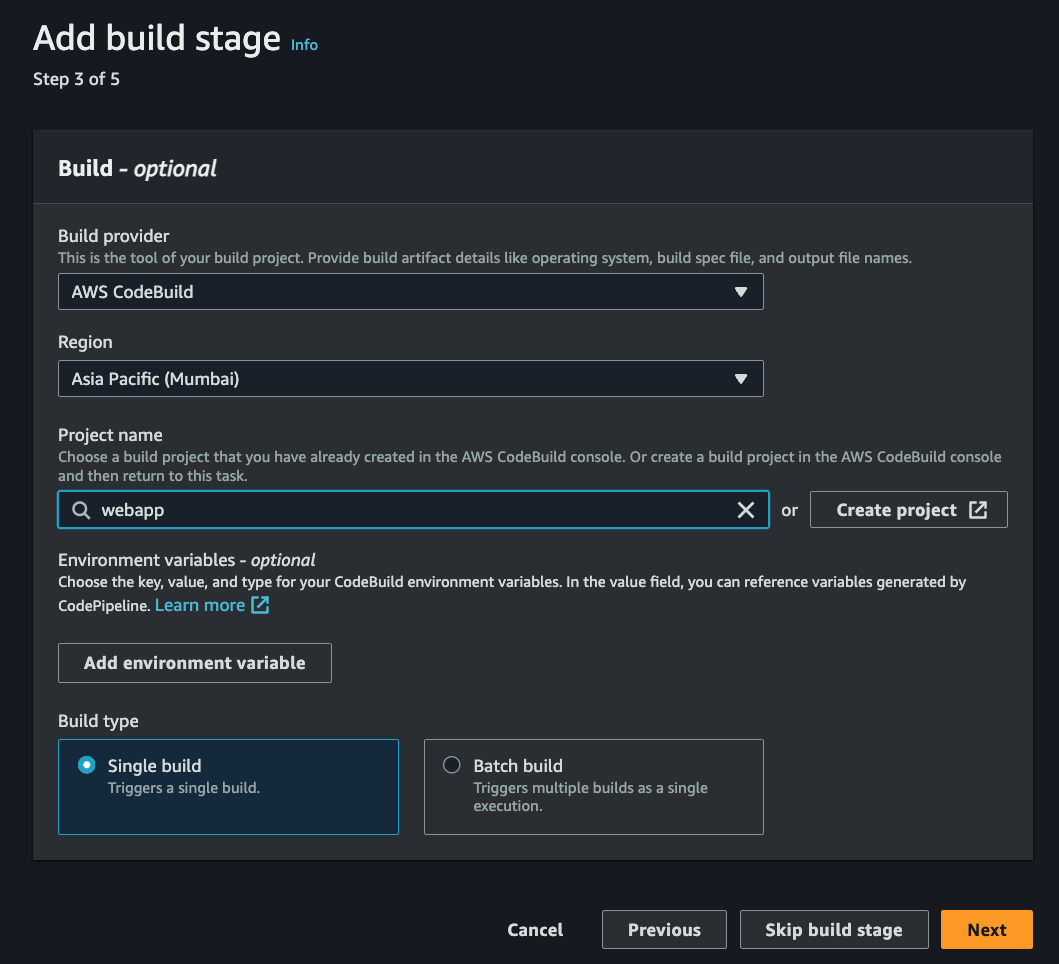
Select AWS CodeBuild as the build provider and pick your project. Add environment variables if needed.
-
Skip the deploy stage (we don't need it here). Create the pipeline.

Now pushing to main triggers a build. Try it.
Extras
The CloudFront cache doesn't invalidate on its own after a deploy, so let's force invalidation in the post-build phase:
version: 0.2

phases:
  install:
    runtime-versions:
      nodejs: 18
  pre_build:
    commands:
      - npm install
  build:
    commands:
      - npm run build
      - aws s3 sync ./dist/ s3://webapp.hstart.in --delete
  post_build:
    commands:
      - echo "Build completed successfully"
      - aws cloudfront create-invalidation --distribution-id ET5XFZER5THY --paths '/*'

artifacts:
  files:
    - "**/*"
Grant CodeBuild's role cloudfront:CreateInvalidation and add the distribution's ARN to the resources array:
{
    "Version": "2012-10-17",
    "Statement": [
        {
            "Sid": "VisualEditor0",
            "Effect": "Allow",
            "Action": [
                "s3:ListBucket",
                "s3:GetBucketAcl",
                "logs:CreateLogGroup",
                "logs:PutLogEvents",
                "cloudfront:CreateInvalidation",
                "codebuild:CreateReportGroup",
                "codebuild:CreateReport",
                "s3:PutObject",
                "s3:GetObject",
                "logs:CreateLogStream",
                "codebuild:UpdateReport",
                "codebuild:BatchPutCodeCoverages",
                "s3:DeleteObject",
                "codebuild:BatchPutTestCases",
                "s3:GetBucketLocation",
                "s3:GetObjectVersion"
            ],
            "Resource": [
                "arn:aws:codebuild:ap-south-1:343391345253:report-group/webapp-*",
                "arn:aws:logs:ap-south-1:343391345253:log-group:/aws/codebuild/webapp",
                "arn:aws:logs:ap-south-1:343391345253:log-group:/aws/codebuild/webapp:*",
                "arn:aws:cloudfront::343391345253:distribution/ET5XFZER5THY",
                "arn:aws:s3:::webapp.hstart.in/*",
                "arn:aws:s3:::codepipeline-ap-south-1-*",
                "arn:aws:s3:::webapp.hstart.in"
            ]
        }
    ]
}
Hardcoding the bucket name and distribution ID isn't great. Move them into environment variables:
version: 0.2

phases:
  install:
    runtime-versions:
      nodejs: 18
  pre_build:
    commands:
      - npm install
  build:
    commands:
      - npm run build
      - aws s3 sync ./dist/ s3://$S3_BUCKET --delete
  post_build:
    commands:
      - echo "Build completed successfully"
      - aws cloudfront create-invalidation --distribution-id $DISTRIBUTION_ID --paths '/*'

artifacts:
  files:
    - "**/*"
Define S3_BUCKET and DISTRIBUTION_ID in CodeBuild: Edit → Environment → Additional configuration → environment variables.
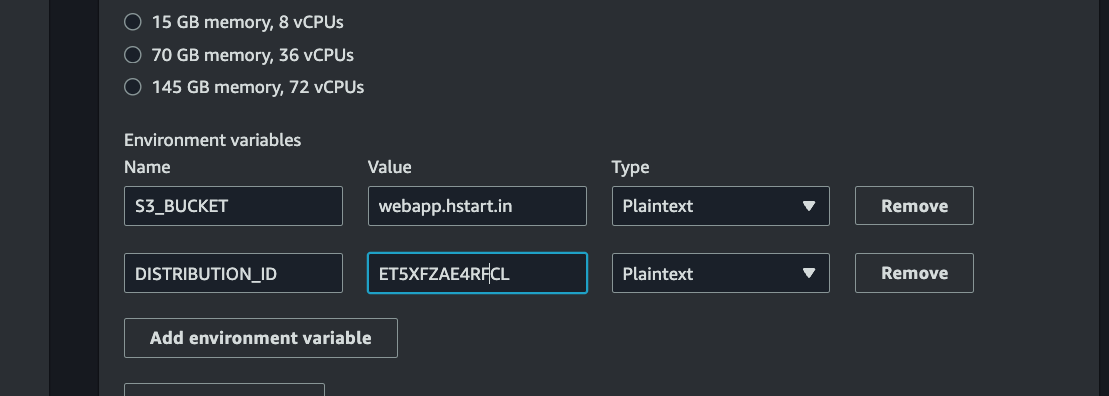
Update the project. Done.
End notes
There's more to add — building and testing on pull requests to catch bugs before they land on main — but this is a working starting point.
If you have questions, drop them in the comments.